Create layouts in interface builder can be tricky sometimes, to me distributing views them proportionally was an example.
While this isn’t so obvious at the first time, you will notice that is quite simple to achieve.

TL;DR
What It’s done here is basically add a container view that hold the UIViews that need be distributed proportionally and make all subviews to have the same width of it’s parent with a multiplier which represents the percentage occupied in x axis.
As usual x and y layouts constraints are required to satisfy AutoLayout.
Source available to download here
Let’s do it in 9 steps!!
This blog post assumes that you have a basic knowledge about layout constraints.
1. Create a new Simple View Project called ProportionalViews
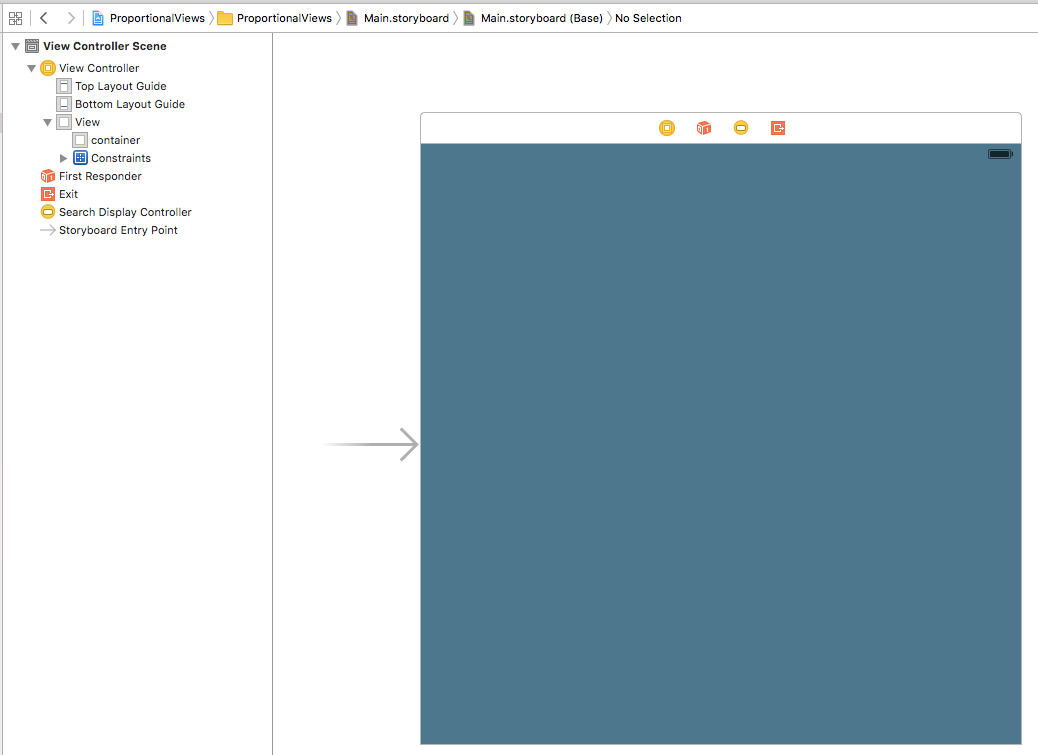
2. Open Main.storyboard and select the ViewController
3. Create a container view that will hold both images
Add a UIView (We will call it container) to the ViewController and pin it to the edges of it’s parent.
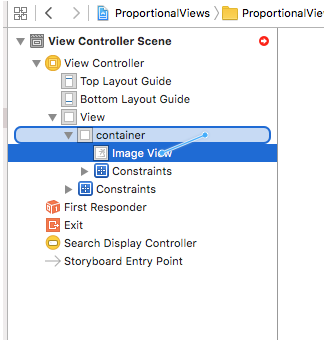
4. Add an image view that will sit at the left side of container
Drag an UIImageView (image1) inside the container and pin the leading, top and bottom edges to it’s parent(container) with 0 constant value.
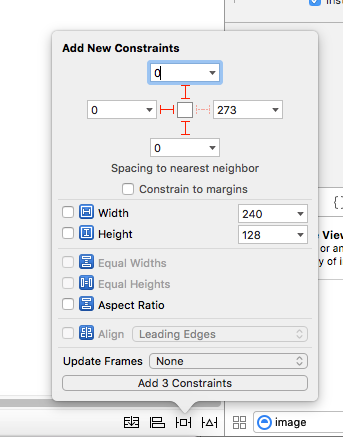
Don’t worry about Interface Builder complaining about width constraint for image1. We will solve this in a second.
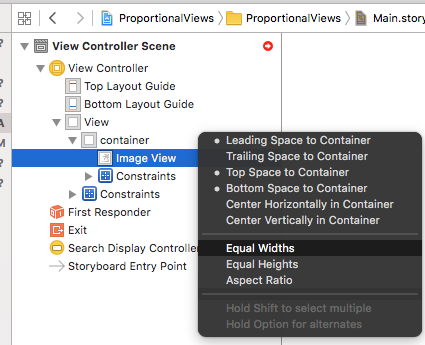
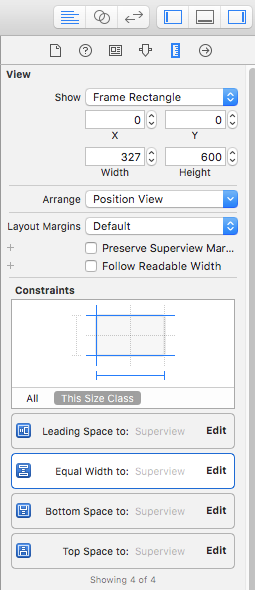
5. Create a constraint to define image1 width to be the same as container
Right click on the image1 on the component tree and drag to the container and select Equal Widths.
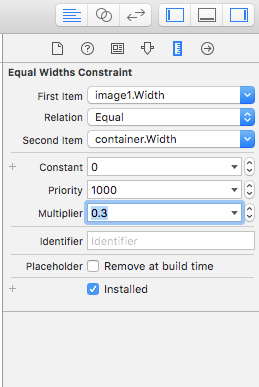
6. Turning image1 width constraint into Proportional Width
Edit the constraint that you just add double clicking on it on on Size Inspector Menu.
Change the value of Multiplier, from 1.0 to 0.3 (or whatever percentage that you want). Setting the multiplier to 0.3 will make image1 take 30% of it’s parent horizontally.
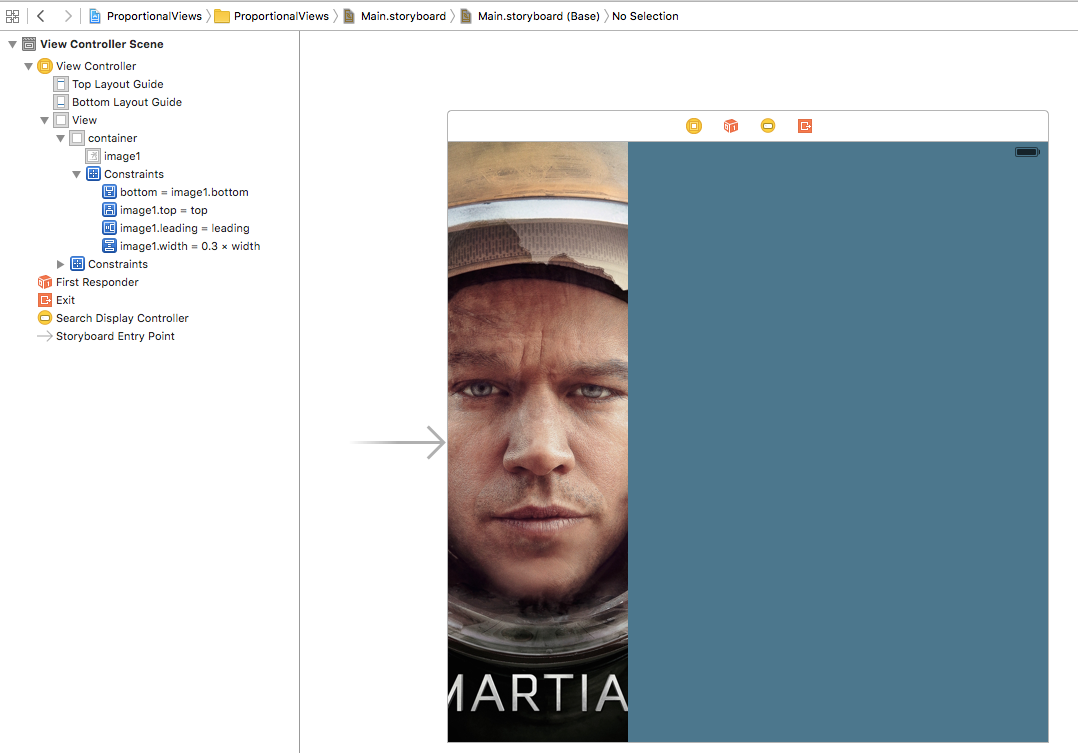
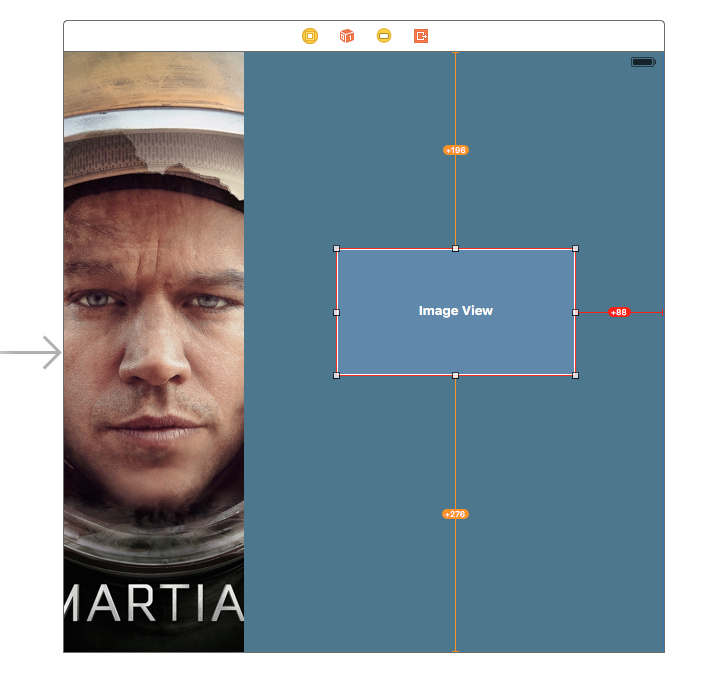
After setting the width, fix the misplacement as suggested in IB and you should have something like this. Notice that set an image in image1.
7. Add another UIImageView that will sit at right side.
Drag an UIImageView (image2) inside the container and pin trailing, top and bottom edges to it’s parent with constant value 0.
IB will again complain about width constraint and we will solve as we did before, by now just ignore this warn.
8. Create a constraint to define image2 width to be the same as container.
Right click on image2 on component tree and drag into container, select Equal Widths. Like we did in step 5.
9. Turn image2 width constraint into Proportional Width.
Edit the constraint that you just created for image2 double clicking on it.Change value of Multiplier, from 1.0 to 0.7 (or whatever percentage that you want). Similar as we did in step 6.
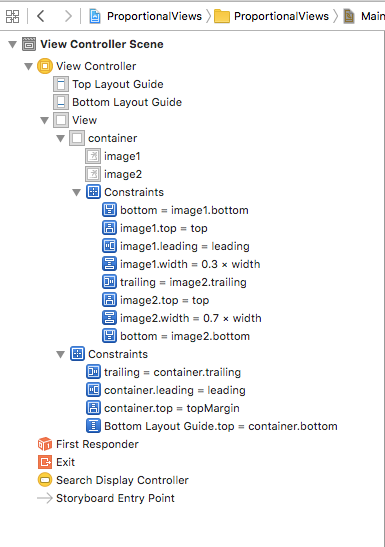
Here are all the constraints for the views.
After fix the misplacement in IB and define images for image views you will finally have a view controller like this: